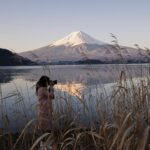
Cities come alive after sunset, transforming into dazzling landscapes of light, color, and energy. Night photography lets you capture this unique atmosphere, from illuminated skylines and neon-lit streets to glowing monuments and lively night markets. Whether you’re exploring Paris, Tokyo, New York, or a hidden gem, mastering night photography will add a new dimension to your travel stories. This comprehensive guide offers essential tips and techniques for travelers who want to capture cities after dark with clarity, creativity, and confidence.
Why Night Photography Is Worth the Effort
- Unique perspectives: Cityscapes, landmarks, and street scenes look completely different at night.
- Vibrant colors: Artificial lights, neon signs, and reflections create dynamic compositions.
- Less crowded: Popular spots are often quieter, allowing for more creative freedom.
- Atmospheric storytelling: Night shots evoke mystery, romance, and the pulse of urban life.
Essential Gear for Night Photography
- Camera: Any camera with manual controls (DSLR, mirrorless, or advanced compact). Even modern smartphones can excel with the right settings.
- Tripod: Crucial for stability during long exposures and sharp images.
- Remote shutter release or timer: Prevents camera shake when pressing the shutter.
- Fast lens (wide aperture): A lens with a wide maximum aperture (f/1.4–f/2.8) lets in more light.
- Extra batteries: Long exposures and cold nights drain batteries quickly.
- Lens cloth: Night air can cause condensation or fog on your lens.
Camera Settings for Stunning Night Shots
- Manual Mode: Gives you full control over shutter speed, aperture, and ISO.
- Shutter Speed: Use longer exposures (1–30 seconds) to capture more light and create effects like light trails.
- Aperture: Use a wide aperture (low f-number) for more light, but balance with desired depth of field.
- ISO: Start with a low ISO (100–400) for less noise; increase only if necessary.
- RAW Format: Shoot in RAW for maximum flexibility in post-processing.
- Manual Focus: Autofocus can struggle in low light; use manual focus or focus peaking for sharp images.
Pro Tips for Night Photography on the Road
1. Scout Locations in Daylight
Visit your chosen spot during the day to plan your composition, find interesting angles, and identify potential hazards.
2. Capture the Blue Hour
The blue hour—just after sunset or before sunrise—offers soft, ambient light and deep blue skies, perfect for cityscapes and architectural shots.
3. Use a Tripod for Stability
Long exposures require a steady camera. Use a tripod, or improvise with a stable surface like a wall or bench.
4. Remote Shutter or Timer
Use a remote shutter release or the camera’s timer to avoid camera shake when pressing the shutter button.
5. Experiment with Long Exposures
Try longer shutter speeds to capture light trails from cars, flowing water, or moving crowds. Start with 5–10 seconds and adjust as needed.
6. Look for Interesting Light Sources
Street lamps, neon signs, illuminated buildings, and reflections in water or glass can add drama and color to your images.
7. Check Your Histogram
Use the camera’s histogram to check exposure and avoid blown-out highlights or blocked shadows.
8. Try Different Angles and Perspectives
Shoot from low angles, rooftops, or through windows for creative compositions. Reflections in puddles or glass add depth and interest.
9. Include People or Motion
Add life and scale by capturing people, moving vehicles, or bustling markets. Use slower shutter speeds to create motion blur or freeze action with a faster shutter.
10. Be Patient and Take Multiple Shots
Night photography often requires trial and error. Take several shots with different settings to find the perfect exposure and composition.
Creative Techniques for Night Photography
- Light Painting: Use a flashlight or phone to “paint” light into your scene during a long exposure.
- Silhouettes: Position subjects against brightly lit backgrounds for dramatic outlines.
- Starbursts: Use a small aperture (f/16 or higher) to turn streetlights into star-shaped bursts.
- Bokeh: Shoot with a wide aperture to blur background lights into soft, colorful circles.
Smartphone Night Photography Tips
- Use night mode: Most modern smartphones have a night or low-light mode for longer exposures.
- Stabilize your phone: Rest it on a solid surface or use a mini tripod.
- Tap to focus: Ensure your subject is sharp by tapping the screen.
- Adjust exposure: Slide your finger up or down to brighten or darken the image.
- Edit after shooting: Use apps to reduce noise, enhance colors, and sharpen details.
Safety Tips for Night Shoots
- Stay aware of your surroundings: Choose well-lit, populated areas and avoid isolated spots.
- Keep valuables secure: Use a crossbody bag or camera strap and be discreet with your gear.
- Travel with a friend: Night shoots are safer and more fun with company.
- Let someone know your plans: Especially if you’re shooting late or in unfamiliar areas.
Editing Night Photos Like a Pro
- Reduce noise: Use software to clean up grain from high ISO settings.
- Adjust white balance: Correct color casts from artificial lights.
- Boost contrast and clarity: Make city lights pop and details stand out.
- Recover highlights and shadows: Bring out detail in bright and dark areas.
- Sharpen: Enhance edges and textures for crisp images.
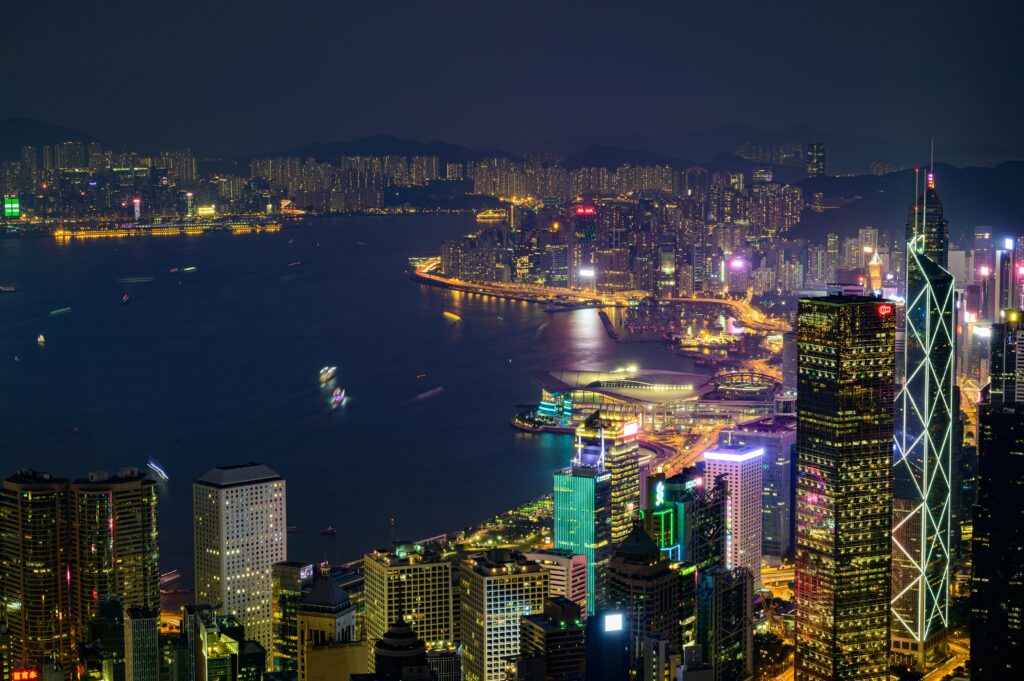
Capturing the Soul of a City After Dark
1. City Skylines
Find a high vantage point for sweeping views of illuminated skyscrapers and bridges. Use a tripod and long exposure for sharp, vibrant images.
2. Street Scenes and Markets
Capture the energy of night markets, food stalls, and nightlife. Use available light and embrace the mix of colors and movement.
3. Landmarks and Monuments
Shoot famous buildings under dramatic lighting. Experiment with reflections, silhouettes, and different angles.
4. Light Trails
Position yourself near busy roads or intersections to capture the streaks of headlights and taillights. Use a slow shutter speed and tripod for best results.
5. Reflections
Seek out water, glass, or shiny surfaces to double the impact of city lights and create abstract compositions.
Common Night Photography Mistakes (and How to Avoid Them)
- Camera shake: Always use a tripod or stable surface.
- Overexposed lights: Check your histogram and use exposure compensation or manual mode.
- Blurry images: Use manual focus and a remote shutter or timer.
- High noise: Keep ISO as low as possible and use noise reduction in editing.
- Flat flash: Avoid using built-in flash, which can ruin the ambiance.
Final Thoughts: Make Your Memories Shine
Night photography is both a challenge and a creative playground. With the right gear, settings, and techniques, you can capture the magic of cities after dark—turning fleeting moments into lasting memories. Be patient, experiment, and let the lights of the city guide your lens. Every night holds a new story, waiting to be told through your photos.
What’s your favorite city for night photography? Share your tips and best night shots in the comments to inspire fellow travelers to capture the world after dark!